Showing posts with label Sweets. Show all posts

Saturday, January 11, 2014

Experiment 17: Pumpkin Gingersnaps

Figure 1.  Pumpkin gingersnap cookies, cracked on top, with a coat of sugar on the surface.
November 2013

Introduction

Well, we're nearing the end of pumpkin season.  Times like these demand that we devise a use for every last bit of canned pumpkin before it is deemed “so last season.”  In an effort to combine our proclivity for making sugary desserts and our desire to absolve our aforementioned pumpkin dilemma, we chose to bake chewy pumpkin gingersnap cookies.  This recipe is super fantastic because it's chewy, unlike most gingersnaps, which are so crunchy they could crack your teeth.  Spoiler alert: Fantastic recipe, definitely try this one at home!

NFPA Ratings
Figure 2. Our NFPA ratings for pumpkin gingersnap cookies.

Difficulty: One point for mixing, one point for rolling.  Just remember to mix your dough before your roll, or else you'll have a big mess on your hands and your floor...especially over carpet.

Baking Time:  If you could fit all of your cookies in the oven, this recipe would take you about 30 minutes to complete.  However, if you are like us and only have one baking sheet or have an apartment-sized oven, you'll have to build more time into your schedule for rotating your cookies in and out of the oven.  The good news is that if you run out of time, you can stuff the extra cookie dough in the refrigerator until you have time to make more cookies.
 

Course:  Dessert, of course!  Not a bad midnight snack either.  And breakfast, if you're not to strict on that whole "balanced breakfast" thing.

Materials
Figure 3. Dry ingredients.  Wet ingredients not shown
due to gross aesthetics.
0.5 cups butter at 22º C (room temperature)
1 cup granulated sugar (+ more in a small bowl to the side for rolling onto the dough)
0.5 cup pure pumpkin
0.25 cup molasses
1 large egg
1 tsp vanilla extract
2.33 cup all-purpose flour
2 tsp baking soda
2 tsp cinnamon
1.5 tsp ground ginger
1 tsp ground cloves
0.5 tsp salt

Methods

1) Preheat oven to 350º F.  In a bowl or stand mixer, beat the butter and sugar together until smooth
2) Add the pumpkin, egg, molasses, and vanilla extract and mix until...you know...mixed
3) In a medium bowl, whisk together flour, baking soda, spices, and salt
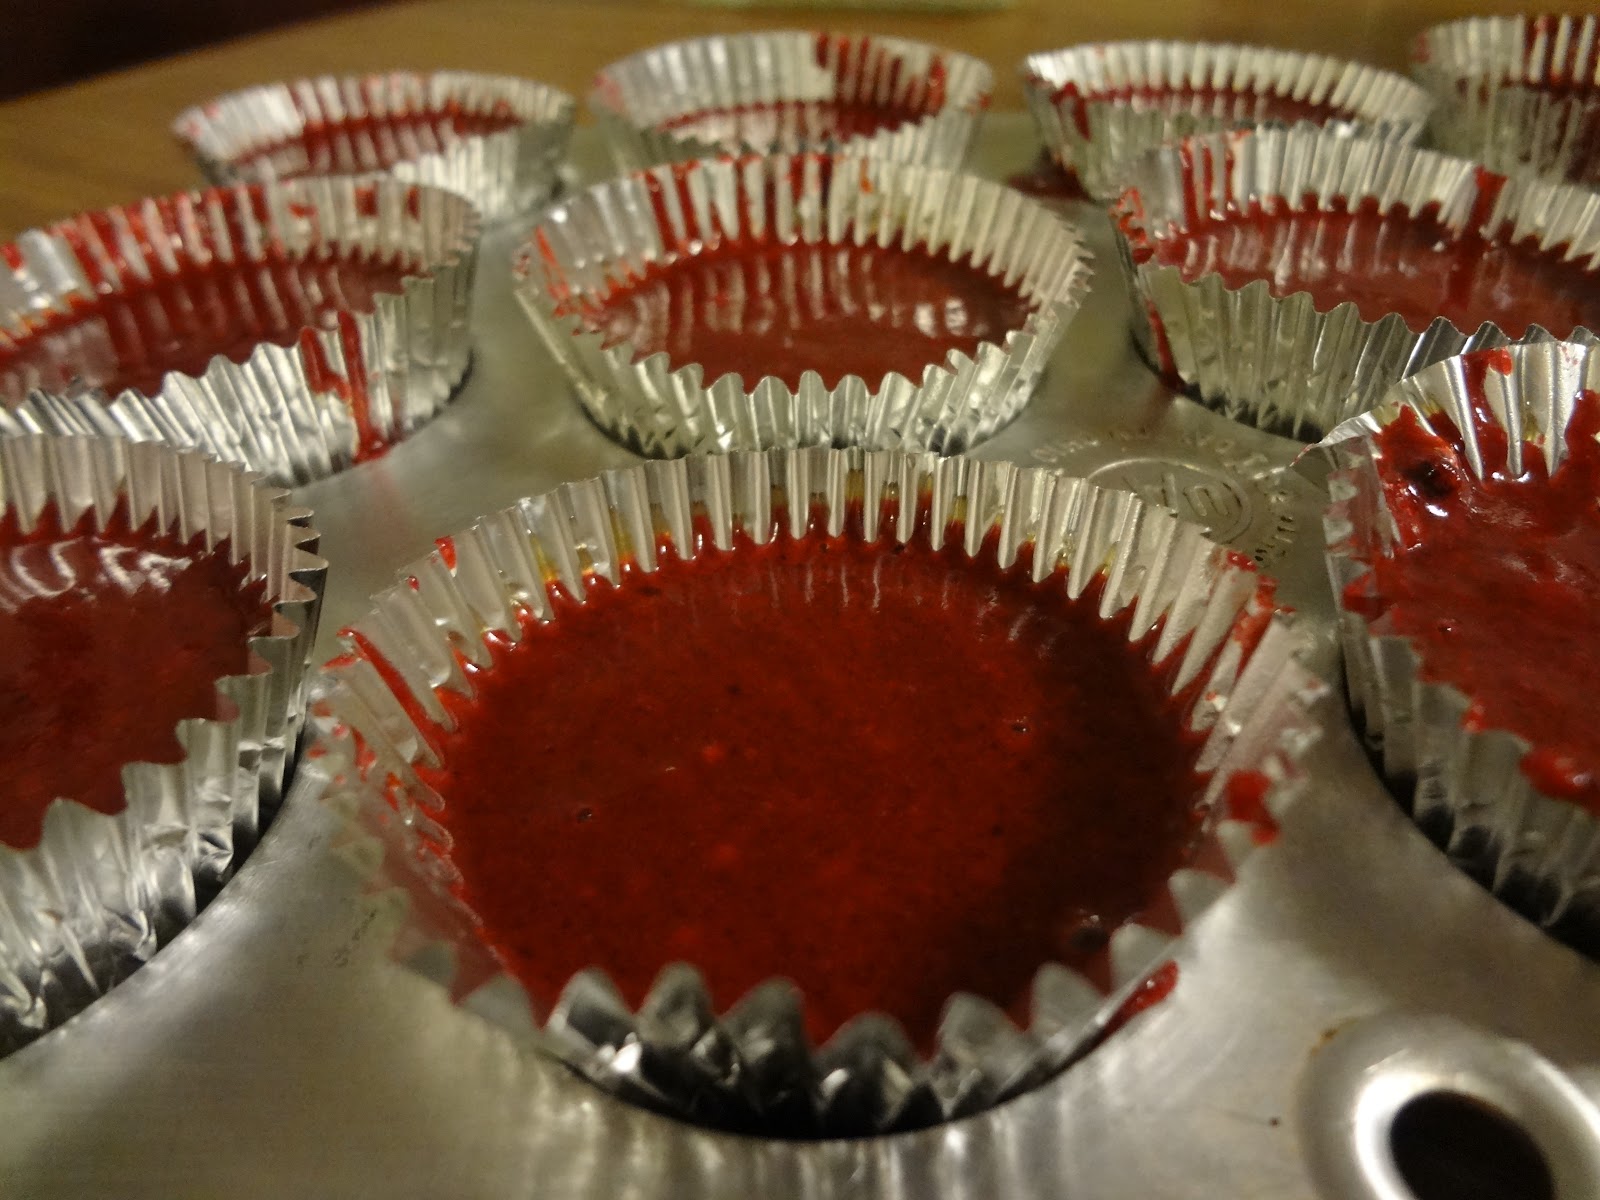
Figure 4. Raw dough
4) Add wet ingredients to dry ingredients and mix
5) Refrigerate for at least an hour but no more than 3 days (Who leaves cookie dough in the fridge for 3 whole days??)
6) Line baking sheet with parchment paper.  Bring back the little bowl of sugar that you placed off to the side earlier.
7) Roll tbsp-sized balls of dough in the sugar and place onto the baking sheet, about 2 inches apart
8) Bake for 10-12 minutes, until the cookies look crackled and set on the edges
9) Let the cookies cool for 2-3 minutes after you take them out of the oven (they will still be soft).  Then, transfer them to a wire rack to cool them completely.

Makes A LOT (30-36) of cookies.


Results
Figure 5. The finished product
These cookies were scrumptious. (n > 35...so tasty) They were sweet but not too sweet, they were pumpkiny but not too pumpkiny.  You could taste the bite of the cloves and the tartness of the ginger.  Every ingredient showed through and hit its mark.  We surprised ourselves and others with the quality of the taste.  In addition, they looked amazing.  It is all too common that a finished baking product does not look like the pictures, but this time, our cookies looked like they came straight out of the blog that had the original recipe.  Super easy, super delicious.  So good we made a second batch.

These cookies were also very soft.  Straight out of the oven, they did not seem fully cooked; however, they finished cooking on their own, and they remained soft and chewy.  

Discussion
Molasses.  It is sold next to syrup at the grocery store, it's brown like syrup, it's thick like syrup...but it does not smell or taste as sweet as syrup.  (Trust us on this.  Please do not dip your finger in to taste molasses by itself.)  What exactly is this unusual pseudo-syrup?  Our initial hypothesis, given its proximity to maple syrup in its consistency, color, and geographical location, was that molasses fell somewhere in the liquid plant product spectrum between maple syrup and tree sap.

Figure 6. Jar of Molasses
(photo credit: somewhere on google.com)
But we were wrong.  Unlike syrup, in the cooking ingredient family tree, molasses is not related to tree sap.  Did the grocery store mis-categorize molasses, or were we tricked?  That's a question for a different blog.

Let's chat about the etiology of molasses.  For the sake of analogy, molasses is to sugar as whey is to curds.  That is, molasses is the byproduct of the sugar-making process.  To purify sugar from sugarcane, the cane is chopped up and mashed, and the leftover sugary juice is boiled multiple times.  Boiling promotes the crystallization of sugar, which is extracted from the mixture.  The leftover juice from each boil is sold as its own product - molasses.  Light molasses, the byproduct of the first boiling, is sweet but does not have a very complex flavor.  This is what we used.  Robust molasses, the byproduct of the second boiling, has a rich flavor and is moderately sweet.  Blackstrap, the leftover syrup from the third boiling, has the lowest sugar content but the richest flavor.  Light molasses is sometimes "sulphured" to preserve it and add flavor, but this is not what you want...really ever.


Figure 7. Molasses on a Spoon
(photo credit: google.com)
Why is molasses used in baking?  Sure, molasses is healthy (it’s fat-free and full of B vitamins, iron, calcium, magnesium, and potassium), but that’s not its purpose in desserts.   Molasses has a rich, complex flavor that arises from its low sugar content.  This flavor lends itself to the rich flavor of everything from gingerbread cookies to barbecue sauce.

Interestingly, molasses is also used as the base for making rum (instead of, for example, hops for beer), and it is added to garden soil to promote microbial growth.

References
Figure 6.  YUM.  YUM YUM YUM!!

Thursday, June 20, 2013

Experiment 16: Sea Salted Caramel Brownies

Figure 1. Sea Salted Caramel Brownies
Introduction
It has become obvious that we are better at baking desserts than cooking healthy stuff.  While contemplating which sugar-packed recipe to make next, we happened upon this recipe for salted caramel brownies.  Though we had planned to make a sophisticated meal that day, we abandoned that idea as soon as we saw these brownies in a recipe online.
Figure 2. Our NFPA ratings for Sea Salted Caramel Brownies


NFPA ratings:
Difficulty: 4
Not too difficult, but you have to read the directions.  The results are well worth it!

Prep. Time: 2 hours.  This is an estimate, as we baked these some time ago and neglected to watch the clock.  About a quarter of this time will be spent with your tuchus glued to a chair waiting for the brownies to cook.  You will really need to use some strong glue because these brownies need to bake in peace.

Course:  Midnight snack for students.  Dessert for everyone else.  Also a decent breakfast!

Materials
Brownies
1) Unsweetened chocolate, roughly chopped - 3 ounces (85 grams)
Figure 3. Sizzling caramel
2) Unsalted butter - 1 stick
3) Granulated sugar - 1 cup
Figure 4. It's much easier to break off pieces of caramel than to cut it.
4) Eggs - 2
5) Vanilla extract - 1 teaspoon
6) Flaky sea salt - 0.25 teaspoons, heaping
7) Flour - 0.67 cups

Caramel
1) Granulated sugar - 0.5 cups
2) Unsalted butter - 4 tablespoons
3) Flaky sea salt - 0.25 teaspoons, heaping
4) Heavy cream - 3 tablespoons

Methods
Caramel
1) Melt sugar in a medium, dry saucepan.  This takes about 5 minutes.  Don't stop stirring!!  The sugar should turn brown.
2) Remove from heat.  Stir in butter, then the cream and salt.
3) Return to medium-high heat.  Simmer and melt any remaining solid butter.  The mixture should bubble.  When it darkens, pour it onto a parchment paper-covered plate and freeze it until it solidifies.  This will take about 30 minutes.

Brownies
1) Pre-heat oven to 350 ºF.  Line the bottom and sides of an 8 x 8 inch (ish) pan with parchment paper.  Butter or spray the paper so nothing sticks to it.
Figure 5. Mix the brownies and fold in the caramel.
2) This step requires a frying pan and a pot.  Boil water in the pot.  Put the chocolate pieces in the pan, and rest the pan on top of the pot.  This method is fit for students like us, but if you're a traditionalist, you could use a heatproof bowl.  Stir until the chocolate is fully melted.  Alternatively, you can microwave and stir (another option fit for the average student).
3) Add the sugar, eggs, vanilla, and salt.  Stir in the flour.
4) When the caramel is solid, remove it from the freezer and chop it into one-inch squares.  The caramel will be sticky and difficult to chop.  We found it easier to just pull it apart into pieces.
5) Fold most of the caramel pieces into the brownie batter and mix gently.
6) Pour the batter into the parchment paper-covered pan.  Place the remaining caramel pieces on top of the batter.
7) Bake for 30 minutes.
8) Eat and marvel at your neurochef skills!

Results
So delicious.  Fantastic taste, and not too difficult.  These brownies balance caramel with chocolate in a way that is sweet, but not tooth-rottingly sweet.  The flavors actually balance really well. You can keep your leftover brownies in the refrigerator or freezer, but make sure to heat them up before you dive back in, both to maintain the structural integrity of your teeth, and to prepare melted caramely goodness for your deserving palette.  Also, plop a scoop of vanilla ice cream on top, and you will forget you are eating reheated frozen brownies.

In cooking this recipe, we learned that folding something into a mix is different from just mixing.  Previously, we just thought it sounded like some pretentious cooking term for fancy mixing.  However, this recipe required us to fold our caramel bits (that we broke because they were too sticky to cut) into our batter.  Folding (a similar motion as folding paper) really seemed to help here.  It helped distribute the caramel more evenly than plain mixing would have.

Discussion
This recipe, while dominated by a plethora of sweet tastes, e.g. sugar, caramelized and not, incorporated sea salt as a primary ingredient.  Of course, these brownies would have baked perfectly fine without the salt; it provides no structural or chemical support of the brownies themselves.  However, without the dash of sea salt, the brownies would simply taste different: the salt (sea salt or regular salt) actually alters the sensitivity of your tongue to other tastants.

One such tastant that benefits from the presence of sodium is glucose.  There's a reason why your caramel corn tastes so good.  The biological mechanisms that underlie the gestalt effect of combining sweet and salty tastes have only recently been elucidated.

It has been proposed that the sodium-glucose receptor/transporter (SGLT1) is responsible for the interaction between glucose and sodium.  SGLT1 is a transport protein, which means it floats around on your cellular membranes and pumps atoms or molecules across membranes into or out of cells.  It was originally thought to only reside in your stomach, but it has recently been found in the taste cells on taste buds as well (Toyono et al. 2011).  Transport proteins are very important, because just like how a water pump pumps water up against gravity to reach your shower, transport proteins work for you by pumping ions and molecules opposite from where their electrical and chemical gradients want them to go.
Figure 6. Sodium Glucose Transport - From Frank Boumphrey (2009)
SGLT1 is a co-transporter (Figure 6; blue).  It pumps one ion (sodium; yellow) and one molecule (glucose; orange) across your taste cell membranes (periwinkle).  However, it can only pump glucose into your taste cells when sodium is present.  The receptor begins open to the outside of the cell membrane.  Once the receptor receives both sodium and glucose, it change its conformation and opens to the inside of the cell, releasing the sodium and glucose.  Since both the sodium and glucose are required for passage into the cell, the salt in your brownies actually makes your taste buds accept more glucose, and in turn causes you to perceive a greater level of sweetness.  Who knew?

References
1) Salted Caramel Brownies. smittenkitchen.com. Feb. 2013
Toyono T, Seta Y, Kataoka S, Oda M, Toyoshima K. Differential expression of the glucose transporters in mouse gustatory papillae. Cell Tissue Res. 2011;345(2):243-52.

Tuesday, April 9, 2013

Experiment 14: Red Velvet Cupcakes


We're back from our hiatus!  
Figure 1. A deliciously red velvet cupcake.
Introduction
For our birthdays, it was between cheesecake and red velvet cake.  Upon finding a cheesecake pan on sale, we decided on cheesecake.  Now, even though both of our birthdays have passed, we still sort of had a taste for red velvet cake, so we decided to revisit it, but this time in cupcake form.

Figure 2. Our NFPA Ratings for red velvet cupcakes.
NFPA Ratings:

Difficulty - This recipe was pretty simple, especially for how well it turned out.  We were afraid we were doing it wrong the whole time, because our mixture looked goopy and oily until it was cooked.  Additionally, all that red made our uncooked cupcakes look like blood.  Fortunately, our cupcakes puffed up in the oven, thus validating our process.

Course - Dessert, or sugary snack if your id compels you.  Also an acceptable midnight snack.

Prep time - It took us about an hour, but looking back, we are not sure why.  The recipe just involves mixing a large variety of ingredients together, pouring the mixture into cups, baking them, and frosting them.  In reality, it will probably take you 45 minutes.
  
Materials
Figure 3. The dry ingredients.

Cupcakes
1) All-Purpose Flour - 3/4 cups
2) Cocoa Powder (no Dutch Cocoa) - 1 tbsp
3) Baking Soda - 1/3 tsp
4)  Salt -1/4 tsp
5) Buttermilk - 1/4 cup
6) Red Food Coloring - 1/2 tbsp
7) Milk - 1 tbsp
8) Olive or Vegetable Oil - 1/3 cup
9) Applesauce - 1/8 cup
10) White Vinegar - 1/4 tsp
11) Vanilla Extract -1/4 tsp
12) Cupcake foil holders
Figure 4. The wet ingredients.  This is where it starts
getting creepy.
13) Muffin Tin

Frosting
1) Unsalted Butter - 4 tbsp / 1/2 Stick, softened
2) Cream Cheese - 1/2 bar (4 oz)
3) Confectioner's (a.k.a. Powdered) Sugar 2-2 1/2 cups
4) Vanilla Extract - 1/2 tsp
 
Procedure
Cupcakes
1) Preheat your oven to 350º F.
2) Put the buttermilk in a mixing bowl.
3) Add in the food coloring, milk, oil, apple sauce, vinegar, and vanilla extract, and mix it all together (Figure 4).
4) In a separate bowl, sift the flour, cocoa  powder, and baking soda (Figure 3).  Add salt and mix in.
Figure 5. The final mixture.  Yum....NOT...yet... 
5) Combine the wet and dry ingredients in one bowl and mix with a spatula just until combined
(Figure 5).
6) Line a muffin tin with foil cupcake holders.
7) Divide the batter evenly among the wrappers (Figure 6).
8) Place your muffin tins on the top shelf of your oven.  Cook large cupcakes for about 20 minutes, and mini cupcakes for approximately 10 minutes.
  
Frosting
1) Whip the butter and cream cheese together for 3-4 minutes
2) Add the sugar in small increments and the vanilla extract.  Mix until it's not too thick, but before it becomes to soft.
Figure 6. Don't pour to the top.  Leave room for puffiness.

Cupcakes
9) Remove the cupcakes and let them cool completely (Figure 7).
10) Pipe on or spread frosting
11) Store in refrigerator.

Recipe will yield 6 large cupcakes or about 15 miniature cupcakes. 

Results
Before we get into our results, we have to admit to a tiny indiscretion.  Instead of making the frosting as described in the recipe, as easy as said recipe looks, we decided to use store-bought cream cheese frosting.  We won't lie...it was goooood.  All things considered, actually making the frosting ourselves would not have been much more of an addition to our responsibilities.  Whatever, this was faster.

Figure 7.  Baked cupcakes.
They look brown...but it's the lighting
Anyway, these cupcakes were tasty!  They were soft, moist, and delicious!  Unfortunately, they turned out a bit more rust-brown than red, even though the blog that owns this recipe guaranteed this wouldn't happen.  Regardless, steps 2-4 resulted in a murder scene-esque mess on all of our utensils.  Adding that much red food coloring into something of that viscosity makes whatever you're cooking look like a mixing bowl filled with blood.  Truly, everything before the final product of this recipe looks very unappetizing. Don't be afraid; just go with it.  It will turn out fine.

Note: While these are delicious straight out of the oven, these are equally, if not more, delicious straight out of the refrigerator the next day.

Other noteworthy points about this recipe are that 1) it has way less sugar than other stuff we've baked, and 2) you don't really need the sifter.  We don't have a sifter and our cupcakes were still light and fluffy.

Figure 8.  The final product, complete with our store-bought frosting.
Discussion

You may think that all you have to thank for the red velvet cake's rich redness is the food coloring it contains.  Big deal, right?  Add a few drops of red food coloring into anything, and voilà, you have red velvet everything you ever wanted!  Red cookies?  Food coloring.  Done.  Red pancakes?  Food coloring.  Done.  Red celery?  Food coloring.  Done.

But wait, red velvet cake contains something special that brings the redness forth independent of the food coloring.  Part of that red color comes from a chemical reaction that happens right in your mixing bowl.

Cocoa contains a chemical called anthocyanin.  Anthocyanin is an antioxidant and natural pigment that is found in plants.  It is present in all sorts of berries, purple grapes, red cabbage, pomegranates, several flowers such as violets and pansies, and, of course, the cacao tree.  The color anthocyanin emits depends on the pH of the environment in which it is found.  In low pH conditions (i.e. in acids), anthocyanin emits a bright red color.  As you raise the pH, it shifts to purple, takes a turn past blue and green, and ends up at a bright yellow (Figure 9).
Figure 9. Anthocynanin over a range of pH values.
How are you going to lower the pH to get that bright red color for your cupcakes?  The buttermilk and vinegar of course!  Buttermilk is acidic because bacteria in the milk ferment the lactose and turn it into lactic acid.  Vinegar, the prototypical acidic agent in your kitchen, is composed of acetic acid and water.  Acetic acid comes from the fermentation of ethanol.  You probably thought it was weird that this recipe called for vinegar, but now you know why it did.

It is absolutely wrong to use Dutch cocoa for your red velvet cupcakes.  Why?  Dutch cocoa is alkaline because of how it is processed.  If you use Dutch cocoa, your cupcakes will turn brown.


Figure 10.  The leftovers...
References
1. Beaird A. ""Chemistry in Cake: Putting the Red in Red Velvet Cake". ChEnected.  October 2012
2. Lassi(e) C. "Eggless Red Velvet Cupcake with Cream Cheese Frosting".  Pan Gravy Kadai Curry: Tasty Tales from a Flexitarian Foodie.  July 2012.

Tuesday, January 8, 2013

Experiment 10: Cheesecake


Introduction
When the clock struck midnight on New Years Day, that marked the halfway point between our two birthdays.  What better way to spend the afternoon before that moment to make cheesecake?

We pulled the crust and cake recipes from two different sources.  The cake recipe does not include any eggs.  In its stead, we used cornstarch, which, if you read our article on thickening agents, you'll know can serve as a perfectly ample substitute.  The crust recipe (naturally egg-less) works with not only cheesecake, but any pie that suits your fancy.

Our NFPA Rankings:


Prep time: The bulk of your time will be spent waiting for your cake to bake. Mixing the ingredients and constructing the cake only take about 20 minutes total. 

Difficulty: This recipe is easy.  Crust?  Mix all of the ingredients together.  Cake?  Mix some of the ingredients together, bake it for a while, mix the rest in, and bake a little more.  It is really hard to make a mistake.

Course:  Cheesecake.  It's what's for dessert.


Figure 3. Stick your graham crackers in a zip-lock bag 
and crush.
Materials and Methods
Crust (Bottom Layer)
Cinnamon graham crackers (GC) - 1.5 cups (1 package of 9-10 GCs)
Sugar - 0.33 cups
Butter - 6 tbsp (melted)
Cinnamon - 0.5 tsp

1) Crush the graham crackers into very fine crumbs (Fig. 3)
2) Mix all of the ingredients together
3) Using the back of a spoon, press the crust into the bottom of a springform pan


Figure 4. Middle Layer of Cheesecake

Cake (Middle Layer)

Cream cheese - 8 oz
Sugar - 1 cup
Cornstarch - 1 tbsp
Vanilla - 1 tbsp 

1) Mix all of the ingredients together
2) Pour into the pan spread it evenly over the crust
3) Bake for 35 minutes at 350 ºF
4) Let it cool for 5 minutes after baking (IMPORTANT!!!)


Figure 5. Top Layer of Cheesecake
Cake (Top Layer)
Sour cream - 1 pt
Sugar - 0.5 cup
Vanilla - 1 tsp
Strawberries

1) Mix all of the ingredients together
2) Spread on top of the first layer
3) Bake for 10 minutes at 400 ºF
4) Chill in the refrigerator
5) Slice some strawberries and arrange them on top of the cake in an aesthetically pleasing pattern.


Results
How can we describe this cake?  To put it straight: this is the most amazing dessert we have ever made, and quite possibly one of the best desserts we have ever eaten.  The cake itself was sweet, but not overpowering, as the tartness of the sour cream balanced out the sweetness of the rest of the cake.  The graham cracker crust was moist and not grainy, sweet and not bitter.  We are definitely happy with our decision to purchase cinnamon graham crackers at the grocery store (as opposed to honey), as the sharp taste of cinnamon proved to be the perfect addition to our smooth, sweet cheesecake.

Figure 6. Our Completed Cheesecake
We also debated as to whether or not we needed to build the crust up on the sides of the pan, or if it should just cover the base.  We opted for the base-only crust, and....wow, was it a great choice.  The sugar on the edge of the cake caramelized when it baked, which serendipitously yielded a sweet, chewy, caramel crust that we could not have come up with on purpose if we tried.

To put it simply, it is not possible to describe how we felt when we consumed this confection.  If we were to try, we would only shame ourselves and disrespect the cake itself.  Each bite brought us closer to enlightenment, and reaching the crust was our awakening.  You should really sit down if you want to eat this cake.  We're not exaggerating.  Try this recipe and you'll see.  If you need a break from life, take in the intoxicating taste of this cake, and let all of your stress melt away.

Discussion
Figure 7. Sucrose
In our cake, the sugar that made contact with the pan caramelized.  What happens when sugar caramelizes? For a long time, it was thought that what happened as a result of heating sugar was that it would turn brown and become a liquid; that the chemical change of sugar molecules breaking apart and reforming into something different is initiated by the heat.  A simple chemical change, end of story.

Figure 8. Caramelized Sugar
However, Professor Shelly Schmidt's research group from the University of Illinois recently found out that it's a bit more complicated (McGee 2012).  Interestingly, they learned that sucrose doesn't just have one melting temperature like most solids.  Instead, two processes occur at two different temperatures.  At one temperature, the individual sucrose molecules break apart and become caramel, and at a higher temperature, the molecules break from each other, causing liquification (Schmidt 2012).  According to Professor Shelly Schmidt, the ranges at which these two processes occur are 290 ºF and 380 ºF, respectively.  Also, the slower the sugar is heated, the more of a chance it has to caramelize, and this reduces its melting point.

It is difficult to determine the exact chemical process that occurred in our oven.  First, the cake cooked at two temperatures, 350ºF and 400ºF, or just below and just above the melting point for sugar, respectively.  Second, ovens tend not to be entirely accurate in setting their temperatures, therefore the exact relationship between our cooking temperature and the chemical state of our cake can not be resolved precisely.  More cooking and testing must be done to fully understand the dynamics of caramelization.  However, we're not going to repeat this experiment a bunch of times because we want to make other foods.

References
1) McGee, H. September 2012. "Caramelization: New Science, New Possibilities." Curious Cook
2) Schmidt, S.J. Exploring the sucrose-water state diagram.  Manufacturing Confectioner, January 2012, 79-89.

Tuesday, November 27, 2012

Experiment 7: Cranberry Apple Crisp


Figure 1. Apple Cranberry Crisp
Introduction
Ahh...Thanksgiving.  Thanksgiving can mean different things to different people.  For some, its a highly anticipated chance to make up lost time with family and friends.  For others, it's about the opportunity to stuff oneself silly with turkey, stuffing, and cranberries.  Lastly, it can serve as a much-needed break from work or school.

For us, it's all three.  Therefore to combine all three of these elements, on one of our days off, we took a recipe born out of a family tradition, and made food.

Here's how we ranked this dish:
Figure 2. Our NFPA Ratings for cranberry apple crisp.

Prep Time: 40 minutes.  While the dish is simple and mixing everything doesn't take very long, it's important to remember to leave enough time to dice five large apples. This will take a few minutes, especially if you make this by yourself.

Difficulty: 2. Cranberry Apple Crisp.  Banana Bread.  Same thing...in a way.

Course: This is undoubtedly a dessert.  It's not even one of those desserts that can double as a breakfast item.  It's too tart.  It doesn't make a great midnight snack or lunch for the same reason.  This is a true dessert.

Figure 3. Granny Smith Apples!
Materials
Apple & Cranberry Mix
1) Granny Smith Apples - 5
2) Ocean Spray Whole Cranberry Sauce - 16 oz. can.  2 - 12 oz. cans. (Yes, we know 12+12≠16.)
3) Sugar - 0.25 cups
4) Flour - 2 tablespoons

Dry Mix Toppings
1) Oatmeal (quick cook or regular) - 1 cup
2) Brown Sugar - 0.5 cups
3) Chopped Walnuts - 0.25 cups
4) Flour - 0.33 cups
5) Cinnamon - 1 teaspoon
6) Butter (melted) - 0.25 cups

Procedure
1) Dice the apples into 1cm pieces.  Mix the cranberries with the apples.  Put the mix into a greased Pyrex dish, 8x8 inches or 9x13 inches.
2) Mix all the dry ingredients.  Spread the dry mix over the top of the apple-cranberry mix.
3) Bake at 375 ºF for 30 to 40 minutes.

Figure 4. Mixture of dry ingredients (left), and mixture of apples and
cranberries (right).
Results
Ingredients for this recipe were purchased at Joe Caputo's, Aldi, and a few other grocery stores. Typically, gala apples are grown in both the US and the UK.  We figure that our apples were grown in the US and then delivered to the grocery store.  However, if they had been UK gala apples, they would have British accents! to be imported by the US, sniffed by the beagles in customs, and eventually sent to the grocery stores.

The result...Not bad!  In fact, we'd say this one was pretty tasty!  The Cranberry Apple Crisp may have been overshadowed by the reprisal of our PCRs and the five pies that were present until eaten, but it held its own admirably on the dessert table.


Discussion
7,000 different varieties of apples are grown around the world, including 2,500 in the US alone (University of Illinois, 2012).  However, we as humans didn't develop all of these varieties on our own.  Unlike bananas and some other fruits, apples are capable of sexual reproduction, which means that each fruit is genetically distinct from its parents, and conversely, none of the fruits produced from one parent is the same.  Over several generations, different traits start to appear, and due to a process called genetic drift, these traits become more and more distinct with each mating cycle.  As a result, you get a whole bunch of different apples with different qualities - different colors, flavors, shapes, etc.  When people started to notice that they liked certain traits, they started selecting for the apples that carried them by continuing to breed them only with each other.

The recipe called for granny smith apples, usually the most tart variety that you'd find at your grocery store.  Instead, we used gala apples.  Gala apples are less tart and more sweet than granny smith apples, which perhaps helped balance out the tartness of the cranberries.

Suggestions for improvement:

1) To be blunt, the crisp fell apart on us whenever we tried to cut a piece.  Not that that's a bad thing.  We're sure that was supposed to happen.  However, we feel that we shouldn't have to put forth that much effort to eat dessert, especially after a big meal.  What to do, then?  After some research, we have concluded that the best additive for this job is probably cornstarch.  A few tablespoons of cornstarch with thicken the jellied cranberries, which will stabilize it.  In addition, unlike flour, cornstarch will maintain the jelly's translucency.  Overall, the addition of cornstarch will make this dessert easier to serve, easier to eat, and will maintain its aesthetic.


2) Apple Cranberry Crisp would taste better with a scoop of cinnamon ice cream on top.  That's a fact.  A few days after making and eating this recipe, we were informed that it is actually best served hot with whipped cream on top.  That sounds great too!

Future Directions
Deep-dish pizza is still on hold, but we're getting there!  Same idea with the spice tuna sushi and everything else we sometimes list in this section.

References
1) Sandman, C and Simmons, J.  November long, long ago.  "Cranberry Apple Crisp".  I'm Writing My Own Cookbook.  p. 57.  
2) University of Illinois Extension. 2012. "Apple Facts". Apples and More.


Tuesday, November 20, 2012

Experiment 6: Banana Bread

Figure 1. Banana Bread
Introduction
What happens when you buy too many bananas, and realize you can't eat all of them before they spoil? You could either invite friends over to eat them, make smoothies, or bake banana bread.  We chose banana bread.

This recipe may seem simple, and to us, slightly below our skill level (look at us, a month of cooking, and we have a skill level now!), but this happened on a Wednesday...so give us a break.  Don't worry, we've packed the Discussion with a bunch of juicy banana science to keep your mind occupied for a while.

Our NFPA ratings:
Figure 2. Our NFPA ratings for banana bread.

Prep time:  Technically, it takes several days for the bananas to become overripe once you buy them.  So, the total recipe takes a few days.  Though, if you started counting after those days, then this recipe would take about 1.75 hours.  Not too bad.

Difficulty: This isn't difficult.  You literally just mix everything and then cook it.  For us, it was a solid 2 (1 is cereal).  Just don't forget to add any of the ingredients.

Course: Banana bread is technically a dessert, though many people also enjoy it as a breakfast food.  It's more of a snack food, but doesn't seem classifiable as a midnight snack.

Materials
1) Sugar - 1.25 cups
2) Butter or margarine - .5 cup, softened
3) Very ripe bananas - 1.5 cups (3-4 medium)
4) Buttermilk - .5 cup
5) Vanilla - 1 tsp
6) All-purpose flour - 2.5 cups
7) Baking soda - 1 tsp
8) Salt - 1 tsp
9) Chopped nuts - 1 cup (optional)

Figure 4. Mixing Ingredients
Figure 3. Adding Sugar
Procedure
1) Position oven rack to low position so that the top of the baking pans will be at the center of the oven.  Heat the oven to 350 degrees Fahrenheit.  Grease the bottom of one 9x5x3 loaf pan.

2) Mix the sugar and butter in a large bowl (Figure 3).  Stir in eggs until well blended.  Add bananas, buttermilk, and vanilla.  Beat until smooth.  Stir in flour, baking soda, and salt until it is all moistened (Figure 4).  Pour the mixture into a pan.

3)  Bake 1-1.25 hours, or until a toothpick inserted in the center comes out clean.  Cool 10 minutes.  Remove from pan and cool completely, about 2 hours, before slicing.  Slice.  Wrap tightly and store at room temp up to 4 days, or refrigerate for up to 10 days.


Figure 5. Sliced Banana Bread
Results
It seems like Betty Crocker's recipes never fail.  This one was pretty tasty!  All of our taste testers enjoyed the final product (n = 11).  It wasn't nearly as special as our Pumpkin Cinnamon Rolls, but it was good.  Banana bread really can't go wrong unless it's dry, and ours wasn't dry at all.

We used regular ol' 2% milk instead of buttermilk, but it didn't seem to matter.  We also didn't include nuts due to a slight miscommunication.

The recipe calls for an obscene amount of cooling.  Pshh...  We didn't wait, and we didn't run into any problems.  Dig right in if you feel like it.

Discussion
Banana bread is best when baked with overripe bananas.  Bananas get sweeter and carry more flavor as they ripen, and it doesn't hurt to infuse the most concentrated banana flavor you can get into your banana bread.  Bananas get sweeter as they ripen because the starches in them get broken down into simple sugars (Macleod and Glassman 2012).  As discussed in our Pumpkin Cinnamon Rolls post (see Discussion), our taste buds are insensitive to starches, but once you break them down into single units of glucose (monomers), they bind to the receptors on our tongue and are perceived as sweet.

Figure 6. Chiquita Banana Plant in Costa Rica (Simmons 2005)
Did you just look over at your newly purchased bunch of bananas and sigh when you realized they're still green?  Don't despair!  There's a way to expedite the ripening process.  Lots of fruits emit ethylene gas, which speeds up the enzymes that cause ripening.  Ethylene is what browns the insides of apples if you leave them out for too long.  Ethylene is so potent that it can transfer from one fruit to another.  Therefore, all you have to do is stick your bananas in an airtight bag to suffocate them in their own ethylene.  To speed things up even further, you can put an apple in the bag with it.  The apple will still be fresh enough to eat after your bananas are ripe.

Figure 7. Chiquita Banana Plant in Costa Rica 
(Simmons 2005)
If you want to slow ripening, apply the opposite concepts.  Hang your bananas or keep them in a wire basket.  This will let their ethylene escape.

How did those bananas get from the tropical climate needed for growing to the temperate environment of your local grocery store?

Many bananas are grown in Central America and shipped, while they're still green, around the world.  Bananas must be sent to their destinations before ripening so that they will still be fresh upon arrival.  At the Chiquita Banana plant in Costa Rica, bananas are grown on the plantation, washed, and later sorted by quality (Fig. 6, Fig. 7).  Next, they are packed to be mailed.  The distributors can control how ripe bananas will be when they reach grocery stores by controlling how much air, and therefore ethylene, reaches them.  Bananas are kept in airtight vaults, where their exposure to natural ripening agents can be tightly regulated, so they can reach grocery shelves healthy and green.

Future Directions
Ideas on the table are: Deep-dish pizza, fried rice, spicy tuna sushi, and latkes.

References
1) MacLeod, T and Glassman, K.  July 2012.  "Do Brown Bananas Have More Sugar?"  Access Hollywood: Healthy Hollywood.
2) Simmons, D.  Sept. 2011.  "Belize & Costa Rica 2005 - (Part II: Costa Rica)"  Dana Goes to Madrid!
3) Upton, C.  Februrary 2010. "How to Accelerate and Slow Banana Ripening" Broken Secrets.

Wednesday, November 7, 2012

Experiment 4: Pumpkin Cake Pops

Figure 1.  You have to taste it to believe it.
Introduction
What do you do with half a can of pumpkin purée?  After making Pumpkin Cinnamon Rolls, we had half a can left, and spent about a week trying to figure out what to do with it.  Pumpkin muffins?  Pumpkin chocolate chip cookies?  Pumpkin bread?  Pumpkin pie?  Sure they all sound good, but we wanted to do something different.  With the help of a friend, we realized we could throw together a simple and sugary recipe for pumpkin cake pops by combining a few other recipes (Eissa 2012).

Cake pops are a great dessert option because they're small.  In other words, they naturally lend themselves to a serving size.  You can have a few sweet bites without feeling like you ate an entire cake.  Be warned though: these are so delicious that you might eat many of them in one sitting, thus negating this idea.  But at least you'll enjoy your dessert!

Explanation of our rankings (Fig. 2)

Prep Time: To be fair, half of the time this recipe requires is the time to cook the pumpkin bread.  You don't actually have two entire hours of work, but you do need to reserve a two-hour time frame.

Figure 2.  Our NFPA-PCP Ranking
Difficulty: This recipe deserved a middle-range ranking for difficulty because although it is not complicated to assemble, it has sub-recipes that you need to keep track of and time.  You have to remember to make the frosting while the cake is cooking, and later you have to remember to prepare the cinnamon-sugar mix.  It's not difficult, but it requires some attention.  Perhaps making a timeline (Fig. 8) can help.
Course: We've said it before, is there a wrong time to eat sugar?  Obviously not. Still, these would be best as a dessert unless you're a student and tend to eat things like this for a meal.  In that case, we've listed these as a midnight snack for the late-night studiers.

Materials
Figure 3.  Mixing everything (See Procedure)
1) Pumpkin puree - 1 can
2) Sugar - 1.67 cups (1 and 2/3)
3) Vegetable Oil - 0.67 cups (2/3)
4) Vanilla Extract - 2 teaspoons
5) Eggs - 4
6) Flour - 3 cups
7) Coarsely chopped nuts - 0.5 cups
8) Raisins - 0.5 cups
9) Baking soda - 2 teaspoons
10) Salt - 1 teaspoon
11) Ground cinnamon - 1 teaspoon
12) Baking powder - 0.5 teaspoons
13) Ground cloves - 0.5 teaspoons

Procedure
Figure 4.  Pumpkin bread.  Mmm...but wait, we're not done!
Pumpkin Bread
1) Preheat oven to 350 degrees Fahrenheit.  Grease or butter a baking pan.  They suggested a few pan dimensions, but we just used whatever we had, and it was fine.
2) Stir all of those ingredients (yes, everything) together in a mixing bowl.  Mix and pour the mixture into your pan.
3) Bake for different amounts of time depending on your pan dimensions.  We used a pie tin and baked the bread for 50 minutes. Just test it with a fork or toothpick to see if it's done.
4) Let the bread cool enough so it doesn't hurt your hands to touch.

Frosting
1. Mix all the frosting ingredients together until it looks like frosting.

Cake Pop Dough
Figure 5.  Cake Pops (not falafel) pre-dusting.
1) Remove two slices of pumpkin bread.  Set aside for tasting!
2) Dump the rest of the pumpkin bread into a mixing bowl and cut it into very small pieces.
3) Scoop the frosting onto the pumpkin bread pieces.  Mix the frosting into the bread with your hands.
4) With your hands, form the cake pop dough into balls with a diameter of about 3 cm.
5) Put some cinnamon and some white sugar into a bowl.  Roll each pumpkin cake pop (one at a time) in the cinnamon-sugar bowl, and make sure you coat the whole surface.  Stop: It's time to do a taste test!
6) Pack up some pumpkin cake pops and stroll over to your neurofiesta!  
 
Results
Sugar!  Whoa!  Serious amounts of sugar!  It's okay though because this recipe is delicious. Of the 6 people who tried these, all six liked them.  Success!
Figure 6.  One finished pumpkin cake pop in a bowl of
cinnamon and sugar.

As usual, we changed our ingredient list a bit.  All ingredients were purchased at Treasure Island (Where else would we go?).  We left out some ingredients (raisins, chopped nuts, and cloves) because we either didn't like them or didn't feel like buying them.  For the pumpkin bread, we halved each ingredient because we only had half of a can of pumpkin puree.  The only ingredient of which we accidentally included the full amount was vanilla, but it didn't seem to matter.

One thing we were concerned about was the pumpkin bread:frosting ratio.  We didn't know how much frosting we would need, so we simply made the same amount as we used for the PCRs last week.
 
Discussion
If you don't want all of that sugar, the pumpkin bread itself should be enough to satisfy your craving for a fanciful dessert.  However, to be honest, adding that extra dollop of frosting is really the way to go.  Don't panic when the frosty orbs of pumpkin bread and glaze come out looking like falafel.  They will taste like best doughnut holes you ever had, with a consistency that is worthy of adjectives that do not yet exist.  Gooey and squishy do not come close to accurately describing the nature of these amazing treats.

Figure 7. D-Glucose.  The corners, except for the
oxygen on the top right, are carbon atoms
Perhaps the reason these PCPs are so purely wonderful is that they are truly meant to fill the insides of a layered, more textured dessert.  We took a shortcut and made the inside of the fruit while avoiding the peel.  In general, cake pops are covered in a hardened chocolate/candy coating, but we just made the soft inside.  You can also go the chocolate-nut route, à la frozen bananas. 

Have you ever wondered what the a molecule of glucose looks like?  Check it out!  Most sugars (e.g. lactose [found in milk], fructose [found in fruits and vegetables], and ribose [found in your DNA]) look like this, except they all have a different arrangement of OH's, and some are shaped like pentagons instead of hexagons.

Most cells store the glucose you consume until it's needed for conversion into usable energy through glycolysis, the Krebs cycle, and/or oxidative phosphorylation.  However, neurons cannot store glucose, therefore they need a constant supply of it from the blood stream. Not only does glucose supply energy to your neurons, but it also enhances memory storage.  In other words, this is brain food!  Ok, so maybe that's an oversimplification.  But still, these PCPs are too delicious to pass up.

Future Directions
Coming Next: Salmon Sushi (We needed to make something with a bit less sugar.  Try our dessert recipes; you'll understand.)
 
Figure 8. Cooking timeline.
References
1) Crocker, B. 2012. "Pumpkin Bread." bettycrocker.com.
2) Eissa, T. 2012.  Advice on combining pumpkin bread and frosting.
2) Perelman, D. 2012. "Pumpkin Cinnamon Rolls." smittenkitchen.com (for the frosting).